


Is This the Best PMD Nymph? Hilbert's Sexy Top PMD | Fly Tying Tutorial
|
|
Time to read 8 min
|
|
Time to read 8 min
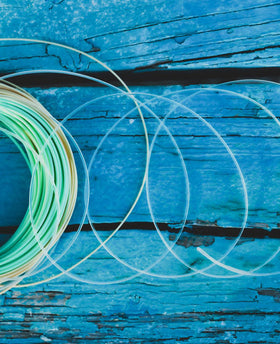
In this fly tying tutorial, Signature Tyer Brian Hilbert walks through his Sexy Top PMD—an all-synthetic, ultra-durable PMD emerger pattern designed for picky trout during mayfly hatches. Inspired by watching a real PMD nymph emerge in the Roaring Fork, the fly features a tapered thread abdomen ribbed with its own thread, a UV-coated body for durability and shine, a yellow Sexy Floss back and head, and pronounced Fluoro Fibre wing buds that perfectly mimic a struggling emerger just below the surface.
Brian covers:
Hook choices (heavy-wire scud hooks like Tiemco 2457)
Thread selection and how to flatten vs. cord thread for bodies and ribbing
Using Veevus Body Quill for a subtle tail
Building a football-shaped tan thorax
Tying in wingcase, legs, and crystal flash with minimal bulk
The signature Sexy Floss looped head that makes the fly so effective
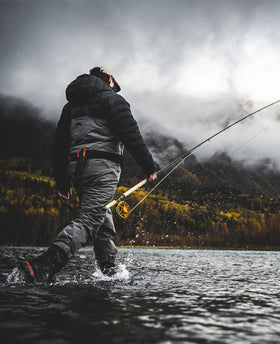
He also explains how he fishes it: on standard nymph rigs, hopper–dropper setups, and short-leash dry–dropper rigs during PMD hatches—often seeing more eats on the emerger than on the dry.
All materials and finished flies are available at Golden Fly Shop, in-store and online.
You can add this as a separate “Materials” section in the blog post and keep the exact links:
Hook: Tiemco 2457 – Size 14–18
Thread 1 (Abdomen – Alternative): Uni-Thread 6/0 – Camel
Thread 2 (Thorax – Alternative): Semperfli Classic Waxed Thread 12/0 – Tan
Back / Head: MFC Sexi-Floss – Yellow (Medium)
Wingcase / Legs: Just Add H2O Fluoro Fibre – Grey
Instagram: https://www.instagram.com/goldenfly.shop/
Shop Online: https://www.goldenflyshop.com
Hey everyone, my name is Brian Hilbert, and today we’re going to tie one of my signature patterns with Montana Fly Company: the Sexy Top PMD.
The hook I have in the vise here is a Daiichi 1120. You can also use the Montana Fly Company 7045, or a Tiemco 2457. Really, any heavy-wire scud hook in that style will work great.
For thread, I’m starting with 140 denier brown. We’ll begin our thread right in the middle of the hook shank.
The first material I’m going to tie in is Veevus Body Quill. This is going to be our tail. It’s a synthetic, very sparse, almost braided material that gives a nice realistic suggestion of the tail that many mayfly nymphs have.
I’ll cut off a short length and capture it right where I started my thread. Then I’ll wrap rearward just slightly down the bend and return to my initial starting point.
Now, a quick note on the 140 denier thread. As you’re tying, especially as a right-handed tier, you’re naturally twisting the thread tighter and tighter, like a rope. The “140” basically means there are 140 individual fibers twisted together to make this thread.
When we’re making a thread body, we want the thread to be really flat. To achieve that, I’m going to rotate my bobbin counterclockwise (looking down from above). You can see that flattens the thread out so it almost looks like floss. That’s going to let us create a smooth, even abdomen.
Using that flattened thread, we’ll build a slight taper:
First, wrap down about ¾ of the way.
Then come back up and go down about halfway.
Then a shorter pass, maybe 25% of the way.
And finally back up to the start.
You can see we’ve formed a nice, carrot-shaped taper. I’ll flatten the thread one more time and wrap rearward to smooth out any lumps or bumps. Once I get back to the tail tie-in, I’ll come right underneath it, rotate my vise, and let the bobbin hang.
Now we’ll use the thread itself as a rib.
This time we’re going to do the opposite of what we just did and cord the thread up. Looking down, I’ll rotate the bobbin clockwise. That twists the fibers tightly together so the thread gets fatter, like a rope. It usually takes a couple spins; you’ll notice your bobbin climbs up closer to the fly as it tightens.
Once the bobbin is raised and the thread is tight, I’ll advance it forward in open, evenly spaced turns to create segmentation. This produces a nice subtle ribbing effect without adding a separate wire or extra material.
When I reach the front of the abdomen, I’ll whip finish. Before you whip finish, make sure you flatten the thread again or the knot won’t seat very well. Then we’ll cut that thread and switch.
Before I start my next thread, I’ll trim the tail so it’s roughly the length of the abdomen.
Next, I’m going to coat the abdomen with a thin UV resin. I’m using Solarez Bone Dry, which is a very thin formula. This adds a ton of durability to the fly and makes the segmentation pop visually.
You don’t want to glob it on like a perdigon—you’re not trying to build a thick shell, just enough to saturate and protect the body.
Once I’m satisfied, I’ll hit it with the UV light for about five or six seconds, rotating the vise as I cure it to get full coverage.
Now we’ll switch to a 70 denier tan thread. I’ll start it right behind the hook eye and wrap rearward to where the abdomen ends.
Because we’ll be tying in several materials near the front—and this hook has a down-turned eye—I don’t want anything sliding off the front. So I’m going to rotate the hook slightly in the vise to give myself a flatter working platform behind the eye.
The first material up front is Montana Fly Company Sexy Floss in medium yellow.
I’ll start that about one hook-eye length behind the eye, right on top of the shank, then wrap rearward to around the 40% mark—that’s where I want my thorax to end. Then I’ll wrap forward to cover and secure the butt ends of the floss.
Next, we’ll grab some Fluoro Fibre in gray for our wingcase and legs. I don’t do an exact count; I go by feel. We’re generally in that 12–15 strand range.
I’ll cut the bundle square, capture it with a loose wrap on top of the floss, then hold it upright and wrap rearward to lock it down so it sits right on top.
Now we’ll finish building our thread thorax with the tan thread.
We’re aiming for a slight football shape—the thickest part in the middle and just a bit thicker than the abdomen. Once it looks right, I’ll pull the Fluoro Fibre forward, using my middle finger to brace it against the hook eye so it doesn’t twist when I bring the thread over.
I’ll take two snug wraps to lock that wingcase down on top.
Then I’ll separate the Fluoro Fibre bundle roughly in half. I’ll take the far-side strands and roll them to the far side of the fly and capture them with one turn of thread. Then I’ll pull the near-side strands toward me and capture them with another turn. That gives us wingcase and legs on both sides.
Next, I’m going to add a subtle bit of flash with pearl Crystal Flash.
I’ll cut a workable piece, lay it on the near side, and capture it. Then I fold it over to the far side and bring my thread straight up; that motion pushes one strand to each side. With just that single turn of thread, we’ve got one strand of Crystal Flash on each side without adding bulk.
Now we’ll advance the Sexy Floss. This is the trickiest part of the pattern and takes a little practice.
I’ll pull the floss over the top with medium tension, again bracing with my middle finger so it stays centered. I’ll capture it with a couple of snug wraps and then check from underneath or the side to make sure it’s centered over the thorax.
Once that’s secure, I’ll make a small loop with the Sexy Floss behind the eye. To lock it:
I come up with my thread and lay it between my thumb and index finger using a bit of slack.
Then I bring the thread around to the other side and pull straight down.
That “pin wrap” captures the loop right where we want it and creates that distinctive yellow head button.
It probably looks easier here than it feels at the vise, but with a little practice, you’ll have that sequence down.
To finish the tying sequence, I’ll do a three-turn whip finish right where we secured the Sexy Floss and trim the thread.
Then I’ll gently pull up on the Sexy Floss and trim the tag so it cinches back down neatly.
Finally, I’ll preen the Fluoro Fibre wing/legs upward and trim them just a little past the back of the wingcase.
To secure everything and add more durability, I’ll use Solarez Bone Dry again.
I’ll apply a small amount right on top of the thread wraps and a tiny bit underneath where the whip finish is seated. That basically ensures this fly will never come undone.
Hit it with the UV light for a good cure, and that’s the finished Sexy Top PMD—a really cool, durable, all-synthetic pattern that’s not too difficult once you get that looped head dialed in.
When I first came up with this fly, I was doing a float trip on the Roaring Fork River. I was leaning over the side of the boat, releasing a fish, and happened to look down into the water.
I saw a PMD nymph swimming toward the surface. It caught my eye, so I watched it. About a foot below the surface, I saw this little yellow head pop out of the front of its body. I thought, “Wow, that’s interesting.”
The nymph stalled there, struggling a bit, and then the wing buds started to pop out. They were really pronounced and obvious, and that little yellow “button” at the front of the nymph stood out.
I made a mental note, went home that night, and designed this pattern around that image. What you see here is version 1.0.
I used to be a diehard Barr’s Emerger angler—no disrespect, that pattern still crushes—but the Sexy Top PMD has basically replaced Barr’s Emerger in my PMD box. There’s just something very triggering to trout about that yellow head and the overall profile.
I fish this pattern a few different ways:
Standard nymph rig – As a primary or trailing fly during PMD activity.
Hopper–dropper setup – I’ll run a jig fly off the hopper and then put the Sexy Top PMD off the jig.
Short-leash dry–dropper – Especially on rivers like the Eagle during a PMD hatch, I’ll fish this 5–6 inches below a PMD dry.
About 50–60% of the time, the fish will eat the little emerger just under the surface instead of the dry.
It’s extremely durable, all synthetic, and relatively simple to tie once you get comfortable looping and capturing that Sexy Floss up front.
All the materials to tie the Sexy Top PMD are available at Golden Fly Shop.
If you’re a fly tyer, you can grab the hooks, threads, floss, and fibers and spin up your own.
If you’re not a tyer, you can purchase the finished Sexy Top PMD flies in-shop or on our website.
If you tie it or fish it, we’d love to hear how it works for you—leave a comment with where you fished it and how it produced. I know it’ll bring you a lot of success during PMD season.
That’s the Sexy Top PMD. Be sure to give it a go.