


This Simple Fly is a Tailwater CRUSHER! - Hilbert's Philly Cheese Crane | Fly Tying Tutorial
|
|
Time to read 9 min
|
|
Time to read 9 min
In this step-by-step fly tying tutorial, Signature Tyer Brian Hilbert demonstrates how to tie his Philly Cheese Cranefly Larvae—a simple, two-material cranefly imitation built on a heavy curved hook, chenille underbody, and sand-colored rabbit strip. Designed as a quick, durable, high-confidence pattern, the Philly Cheese offers bold segmentation and lifelike movement, with the rabbit tail undulating in the current to perfectly mimic a drifting cranefly larva.
Brian explains how to:
Select and prep quality rabbit strips for the best segmentation and movement
Build a chunky chenille underbody and secure a rabbit strip so it won’t spin or loosen
Use super glue, careful thread work, and smart trimming to create a durable, cigar-shaped body
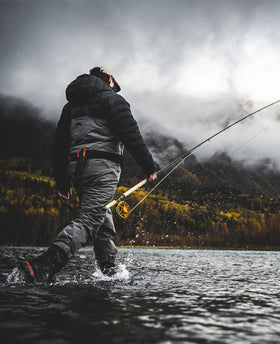
He fishes this fly primarily as an anchor nymph on standard and Euro-style rigs, but notes that some anglers also fish it behind streamers. Proven on technical Colorado tailwaters (Cheesman, 11 Mile, Deckers), as well as rivers in Wyoming, Montana, Utah, the Snake River, and even Texas’ Guadalupe, the Philly Cheese is a year-round cranefly pattern that trout recognize and crush.
You can drop this into a “Materials” section on the blog:
Follow along as MFC Signature Tyer, Brian Hilbert, ties his killer cranefly nymph pattern, the Philly Cheese Crane.
Materials:
Hook (Alternative): Tiemco 200R – Size 6
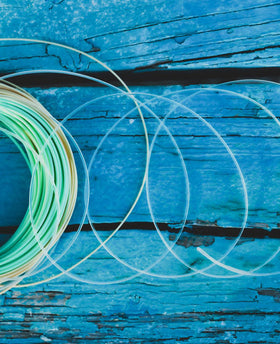
Tail/Body: Hareline Rabbit Strips – Sand Variant
Collar: Underfur from rabbit strip
Instagram: https://www.instagram.com/goldenfly.shop/
Shop Online: https://www.goldenflyshop.com
Intro
Hey everyone, I’m Brian Hilbert. Today we’re going to tie my Philly Cheese Cranefly Larvae.
First thing we’re going to do is put our bead on the hook.
I like the MFC countersunk tungsten beads in black nickel. On this fly I’m using a 3.8 mm bead on a size 6 TMC 2011R. I usually tie this pattern in sizes 6 and 4—you definitely want to fish them on the bigger side.
For thread, I’m using 140 denier brown. The exact color isn’t critical—any darker brown or tan thread will work. I’ll start the thread right behind the bead.
Next, I’m going to grab some chenille. You can use almost any chenille you want:
Ultra chenille like you’d use for a San Juan Worm
Chenille you’d use for Pat’s Rubber Legs
The color and type of chenille isn’t super important because we’re going to cover all of it up. Its main job is to build bulk for the underbody.
I’ll cut off a working length of about 6–7 inches and tie it in right behind the bead. Then I’ll make touching turns with my thread as I wrap rearward.
I like to stop my thread so that when the bobbin is hanging straight down, it lines up with the barb of the hook. Then I’ll advance my thread back forward to behind the bead.
Using the rotary feature on the vise, I’ll wrap the chenille forward in tight, side-by-side wraps all the way up to just shy of the bead, ending right on top. I’ll secure it with a couple of thread wraps and then cut the chenille off with a pair of sharp scissors.
Now I’m going to work my thread rearward again—not necessarily to cover the chenille—but to position it where I want to tie in the rabbit strip.
I’ll build a small thread ramp and landing pad a short distance behind the bead. This is where we’ll anchor the rabbit strip (what I’m calling the “zonker”).
This is a very simple, affordable fly to tie—it only uses a couple of materials. The ramp helps us tie that strip in cleanly and keep it from spinning.
The other main material is a rabbit strip in a sand variant. You can do this fly in a bunch of different colors:
Cream
Olive
Natural tan
Rusty brown
Play around with it. The color I’m using here is kind of a tan-gray.
Not all rabbit strips are created equal, so it pays to inspect the quality:
You want the strip to be full, without bare spots where hair is missing.
You also want the hide to be a little on the thicker side—that thicker leather is what gives the fly its segmentation when wrapped.
Looking at the strip, you can see the hair is flowing from right to left. That’s the direction we’ll wrap it.
I’ll start at the tail end of the strip. I line up the hide with the point where I ended my thread wraps.
Then I measure the length by bringing the strip forward along the shank so I know how much I’m going to use. I’ll moisten my fingers and slick the hair back at the rear end to expose bare hide.
I’ll switch hands and do the same at the front end—slick the hair back to expose a clean tie-in area. The goal is to have exposed hide so we can get a really solid anchor when we tie it in.
I’ll position the hide right on top of the hook where I built that thread ramp, and do a medium-tension wrap first just to make sure it stays exactly where I want it.
Once I like the position, I’ll follow up with a few tighter wraps—three or four turns—to really lock it in.
The strip will want to spin on the hook if you’re not careful. To prevent that, I’ll pull the strip rearward and, instead of wrapping over the top of it and creating a hump, I’ll do some thread wraps rearward, pinching down around the original tie-in point. That compresses the hide and the thread ramp together so it no longer wants to spin.
Then I’ll advance my thread forward again and do a quick half hitch right behind the bead. I’ll let the bobbin hang.
For durability, I like to come in with a little super glue. I really like Wapsi Fly-Tyer’s Z-Ment; it comes with a nice brush applicator.
I’ll flip the fly upside down and put some glue right at the tie-in point and a little bit forward of it. That way when I make the first rabbit wrap, it really anchors down and will never twist or spin loose on the shank.
Now I’ll bring the rabbit strip around and make the first wrap right over that glued tie-in area.
Once I’ve made a full turn, I’m going to advance the strip forward:
Each wrap overlaps the previous one by about half the width of the hide
As I go, I’ll use my free hand to sweep the fur rearward so it doesn’t get trapped under the next wrap
I’m using enough tension to keep things snug, but not so much that I stretch or distort the hide
I’ll continue that all the way up to the bead.
When I get to the bead, I’ll moisten my fingers again and slick the fur back to expose a bit of hide. You get a much more secure tie-down if your thread bites into bare leather and not just on hair.
Then I’ll come in with sharp scissors and cut the rabbit strip off as close as I can to the tie-down spot.
Because the wraps aren’t cranked super tight, after a dozen fish or so the front could start to loosen if you don’t secure it. To prevent that, I like to rotate the fly about a quarter turn and really wrap thread over the butt end of the hide to lock everything down.
Then I’ll cover that butt end with thread to smooth it out.
Next step is to brush the fur out and shape the body.
I’ll use a simple dubbing brush—my “Colgate special.” It’s just an old toothbrush run through the dishwasher and then cut at an angle. That gives a rougher, more “Velcro-like” end for teasing dubbing and fur, and a softer side if you want a lighter touch.
I’ll brush the fly up and down the body to make sure none of the fibers are trapped and to fluff everything out.
Then I’ll pinch the top of the fur and make a cut so the fibers are about 1/16" to 1/8" long off the hide. I’ll keep that little clump of cut fur, pull out a bit of underfur, and use that as a small dubbing collar at the front if needed.
Before doing any more trimming, I’ll cover everything up with a bit more thread and then apply another healthy dab of super glue right behind the bead. That locks in the front of the rabbit strip and gives the dubbing and thread something to bite into.
Now I’ll do a whip finish right into that still-wet glue behind the bead and cinch it down. That knot is not going anywhere.
All that’s left is the final trim work.
I’ll brush the fly out again, then:
Trim the bottom so it’s a little flat and neat
Rotate the vise and trim around the sides
Aim for a soft cigar-tube shape overall
Always err on the side of leaving it a little long. It’s much easier to take more off than wish you could glue fur back on.
The tail area can be a little tricky:
I’ll hold the back end of the hide,
Then pinch just the fur,
And make a cut going rearward to shorten it to where I want it.
There’s almost always a bit of cleanup afterwards, but don’t get too carried away trying to make it perfect. This is an ugly fly by design, and in my experience the perfectly trimmed ones don’t fish any better than the slightly ragged ones.
I like to take it out of the vise, snip any obvious stray fibers, and then cut the hide at the very end into a point.
And that’s a finished Philly Cheese Cranefly Larvae.
This fly is a really effective, opportunistic meal for trout. Trout everywhere know what a cranefly larva is, and they go out of their way to eat them.
What sets this pattern apart from a lot of commercial cranefly imitations:
Great segmentation – The rabbit hide naturally creates segmented look, especially when wet.
Involuntary movement – That tail undulates and wiggles on the drift, looking exactly like a cranefly larva tumbling in the current.
It’s a simple, durable pattern, and you can easily catch 20 fish or more on one and put it right back in your box.
I usually fish this as an anchor fly on a nymph rig. You can also fish it on a Euro setup tight-line style. It’s mainly meant to be fished on a dead drift.
I’ve had folks tell me they like to trail it behind a streamer and twitch it off the bank—that probably works great too, even though I don’t personally fish it that way.
I originally designed this pattern because I wanted a quick, durable cranefly imitation that didn’t require a ton of materials or tying time. A lot of commercial patterns are either too time consuming or overly complex. This is basically a two-material fly, and once you’re in a rhythm, you can tie one in about three minutes.
I’ve caught fish on the Philly Cheese Cranefly Larvae in:
Technical Colorado tailwaters like Cheesman Canyon, 11 Mile, and Deckers
Rivers in Wyoming, Montana, Utah, and on the Snake River
Even down in Texas on the Guadalupe
If you have craneflies in your water—and most trout rivers do—this is a killer pattern to add to your box.
If you’re not a tyer, this pattern is available through Montana Fly Company, and you can buy it here at Golden Fly Shop or online.
If you do tie and fish it, we’d love to hear how it works for you—drop a comment with where you fished it and how it produced.