


Too Much Flash on a Streamer?? NEVER! Dick's Lysergic Perch from Rio Products | Fly Tying Tutorial
|
|
Time to read 9 min
|
|
Time to read 9 min
Richard, a Signature Tyer for RIO Products, shows us his favorite streamer—one that was highlighted in our previous Dream Stream winter streamer video.
Material List:
Hook: Gamakatsu B10S
https://www.goldenflyshop.com/product...
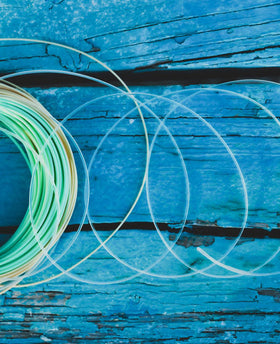
Thread: Semperfli Nano Silk – 6/0 Orange
https://www.goldenflyshop.com/product...
Tail: MFC Barred Marabou – Yellow/Black
https://www.goldenflyshop.com/product...
Tail Flash: Hareline Krystal Flash – Orange
https://www.goldenflyshop.com/product...
Belly: MFC Sparkle Minnow Brush – Hot Yellow
https://www.goldenflyshop.com/product...
Body: MFC Sparkle Minnow Brush – Peacock
https://www.goldenflyshop.com/product...
Eyes: Fulling Mill Epoxy Baitfish Eye – 4 mm Red
In-store only (for now)
Instagram: https://www.instagram.com/goldenfly.shop/
Shop Online: https://www.goldenflyshop.com
Intro
How’s it going everyone? I’m Richard with Golden Fly Shop. Today we’re going to be tying RIO’s Lysurgic Perch.
This thing is pretty awesome. I designed it up in Montana when I lived on the Missouri River, and I’ve caught more two-foot brown trout on this little guy than you could possibly imagine.
To start off, we’re using a size 1 Gamakatsu B10S. It’s one of my favorite streamer hooks:
Very sharp
Not crazy expensive
If you dull the point on a rock, you can touch it up quickly with a hook file and get right back in the game
Get the hook in the vise nice and tight.
For thread, I’m using Semperfli Nano Silk 6/0 in orange. It’s very strong, small diameter, and doesn’t bulk the fly up where you don’t want it.
I’ll start my thread behind the eye, wrap toward the eye, then back toward the bend to lock it in, and trim the tag with a sharp pair of scissors. I like keeping one sharp pair and one dull pair on the bench.
I’ll wrap back until my thread is about in line with the hook point, then adjust a wrap or two until it’s where I want it. That gives us a nice thread base.
For the tail, we’re using Montana Fly Company Barred Marabou in perch-y colors. It’s just marabou but with barred tips, which gives a great look and swim in the water.
This size 1 version calls for about 3–4 feathers
On a smaller size 6, you might use 2
On a bigger version, you can go 4–5 feathers for more volume
I’ll pull a feather out, strip off any wild or overly bulky stuff, and soak or wet it in a little cup of water (don’t put dyed feathers in your mouth—those dyes can be nasty). Wetting helps all the fibers lay back in the same direction.
Holding the tip, I’ll stroke the fibers back and strip out the really short ones that won’t show in the tail. That keeps us from bulking the fly up with junk fibers.
I repeat that process for each feather so I have a small stack of prepped marabou with tips aligned. In this example I ended up using four blood quill marabou pieces to get the volume I want.
Now I measure the tail:
Roughly one full hook shank in length
Plus about one to two eye lengths beyond that
Once I’ve measured, I pinch the marabou where I want it and get ready for a pinch wrap.
Before the pinch wrap, I’ll spin the bobbin counterclockwise. That flattens the thread and makes it jump slightly backward as it comes around the hook, helping it capture the material.
Place the marabou on top of the shank with your left hand
Bring the thread up and over for one soft wrap
Do a second wrap, still holding the tail in place
Then start adding tension and pull down
You should feel the tail lock in. I’ll continue wrapping forward over the butts with increasing tension to really secure everything.
Once it’s locked, I grab my sharp scissors and trim the marabou butts as close to the thread base as I can. Then I wrap forward over the stubs until they taper out smoothly. That gives you a clean transition and avoids a lumpy body.
Next up is flash. I’m using Hareline Krystal Flash in orange.
Krystal Flash has:
Great light reflection
Good movement
Enough stiffness to stay in place on the fly
I’ll pull three strands, cut them in half, and use them doubled over on each side for a total of six strands per side.
Far side first:
Lay the three strands around the thread
Pinch them between thumb and index finger
Use the thread to place them exactly where you want on the far side
Tie them down with wraps moving back toward the tail
Pull them back and trim to match the length of the marabou
Then repeat the exact process on the near side with another three strands, trimming to match.
At this point, the tail and flash are complete.
In order for this fly to swim the way we want and get into the strike zone quickly, we’re going to add some lead wire.
I don’t like dumbbell eyes or coneheads on this pattern—they create a strong jigging action. Jigging can be effective, but for this fly I want more of a gliding, sweeping action, so I put the weight further back on the shank.
I’m using 0.025 lead wire:
Wrap a short section around the shank (mid-body)
You can cut it with dull scissors or just wiggle the wire until it snaps (lead is soft)
After handling lead, wash your hands. Don’t go grab a slice of pizza right after.
Now we need to cover and secure the lead so it doesn’t shift and so later materials lay nicely:
First, I run thread across the grooves in a criss-cross pattern a few times (like making a ladder)
Once there’s a thread “ladder” built up, I start wrapping directly over the lead
That fills the gaps and creates a smooth thread base
Does the fly still work if you skip this step? Sure. But it ties and fishes better if you take the time to lock that weight down.
Now we build the belly.
For that I’m using Montana Fly Company Sparkle Minnow Brush – Hot Yellow. These brushes make tying easier and save the time of building dubbing loops.
I’ll cut two to three short sections of the brush, each about hook-shank length, and wet or pinch the fibers so they all lay in the same direction.
Then I rotate the hook so the belly is facing up, and with the fibers pointing backward (toward the tail), I tie those brush pieces in on either side of the shank at the point where I want the throat/belly to start. When we pull them forward later, they’ll marry together and fill in the underside.
Next is the main body material: another MFC Sparkle Minnow Brush, this time in peacock.
Usually one full brush is enough for a size 1; very occasionally you might need a second.
I strip back a bit of the fibers to expose the core wire and tie it in by the wire. Again, I spin the bobbin counterclockwise so the thread jumps back and really grabs the wire.
Once it’s secure, I move my thread forward to just behind where the eyes will go and put in a half-hitch to park the thread and keep it out of the way.
If you want, you can clip hackle pliers onto the brush to help with grip when you start wrapping.
To build the body, we’re going to palmer the peacock brush:
Wet the brush so all the fibers lay back in the same direction.
The first full wrap is critical—keep it very tight.
After each wrap, use your fingers to sweep the fibers back so you don’t trap them.
If you have a rotary vise, this is where it shines: you can keep steady tension on the brush and simply rotate the vise, teasing fibers back between each turn.
I keep going forward with tight, even wraps, re-wetting as needed to keep fibers under control. I stop short of the eye to leave room for the eyes and head.
At the front, I separate the fibers a bit to expose the core wire, then:
Do a couple thread wraps over the wire to lock it
Trim the wire close
Use a fingernail to bend the remaining bit down and cover it with thread so it doesn’t cut your thread later
Then I brush everything out so the body is full and even.
Now the fly looks wild—a big, fuzzy blob. Time for a haircut.
First, I brush and tease the fibers so they’re flared evenly around the shank, making sure not to drag the marabou tail or crystal flash into the body.
Step 1 – Belly Cut:
Rotate the hook belly-up
Twist the belly fibers together and cut straight along the shank, tight to the hook
This flattens the bottom and exposes the yellow belly brushes we tied in earlier
Clean up any stragglers
Step 2 – Top & Sides:
Carefully trim the top and sides into a streamlined baitfish profile
Avoid cutting the marabou tail or the Krystal Flash
Use your fingers like a barber: pinch and pull to the length you want and trim in small steps
Aim for a slightly longer top, shorter bottom, and a nice, rounded perch shape
Once I’m happy, I rotate back belly-up and pull those hot yellow belly brush fibers forward, marrying the three segments together and tying them down firmly under heavy tension so the wires disappear and the belly looks solid and clean.
Trim the excess wire stubs with dull scissors, then smooth everything with thread wraps. This also creates a solid foundation for the eyes.
I’ll do a half hitch or small whip finish here because the tying portion is basically done.
Time for the eyes.
For the perch version, I like 4 mm red eyes:
Here I’m using 4 mm “Living Eyes” (Fish-Skull style);
My favorite for value are Fulling Mill Epoxy Baitfish Eyes—tons of eyes for the money.
Eyes are easy to lose, so I keep them sitting in my palm where I can see them.
I’m using UV resin instead of super glue. Super glue can fog the eyes or leave your fingerprint on them if you touch the surface. UV lets you position things perfectly and then lock them in.
Far-side eye first:
Rotate the fly so the eye area is facing up
Use a thicker-viscosity UV resin and put a decent-sized drop where the eye will sit
Use a bodkin to shape that glob
Place the eye into the resin and adjust until it looks right
Once you’re happy, hit it with the UV torch to cure
Repeat the process on the near side with another drop of thick UV resin and the second eye.
Then I switch to a thin UV flow:
The thin resin will wick into all the remaining gaps around the eyes
Be careful—it flows quickly
Fill negative space around the eyes and head and cure with the light
On the underside, because yellow perch have bright hits of orange and yellow around the throat, I add a touch of hot orange UV resin under the chin, smooth it with a bodkin, and cure.
If any resin gets into the hook eye, I clear it with a needle before curing too much more.
Finally, I do one more pass with the thicker resin to shape the head the way I want—strong, smooth, and balanced—and cure it thoroughly.
Last step: perch bars.
I use a black Sharpie (or any permanent marker). If you’re tying a bunch, gloves are a good idea so you don’t dye your fingers.
I take the fly out of the vise, set it on a scrap piece of paper, and draw 2–3 vertical bars on the sides:
Instead of long strokes, I dab the marker into the fibers so the ink penetrates the brush
Once I establish the line on one side, I carry it over the top and down the other side so it meets in the middle
Repeat for each bar along the body.
Once you’re done, pop it back in the vise and fluff the marabou tail—either let it dry naturally or tease it with your fingers so it’s big and full.
And that’s how you tie RIO’s Lysurgic Perch.
It’s a fantastic, versatile streamer. I originally designed it for big brown trout, but:
Largemouth
Smallmouth
Northern pike
Walleye
Crappie
…all like to eat it, too.
Come on down to Golden Fly Shop if you want to learn more or see it in person.